Modular Environment Workflow (3D): Build Faster, Stay Consistent, Ship Cleaner
Modular environment workflow is one of the most practical skills in 3D for games, VR experiences, and real-time cinematic scenes. If you’re building an environment inspired by entertainment spaces—like a casino lounge, poker room, or neon game floor—quick visual reference browsing can help you lock the right shapes, props, and mood early; for example, you can skim https://gerikazino.com/ to get a sense of common casino-style elements (18+ only, and treat it strictly as inspiration/reference). Modular workflow then lets you recreate those spaces efficiently by using a reusable kit of parts that snap together cleanly and stay consistent across a whole level. Instead of modeling every wall, corner, and prop as a one-off object, you design a system that scales.
Think of a modular kit like LEGO for environments. If you design the system well, you can create multiple locations (hallways, rooms, storefronts, lobbies) from the same building blocks—and you can update the whole scene by improving one module.
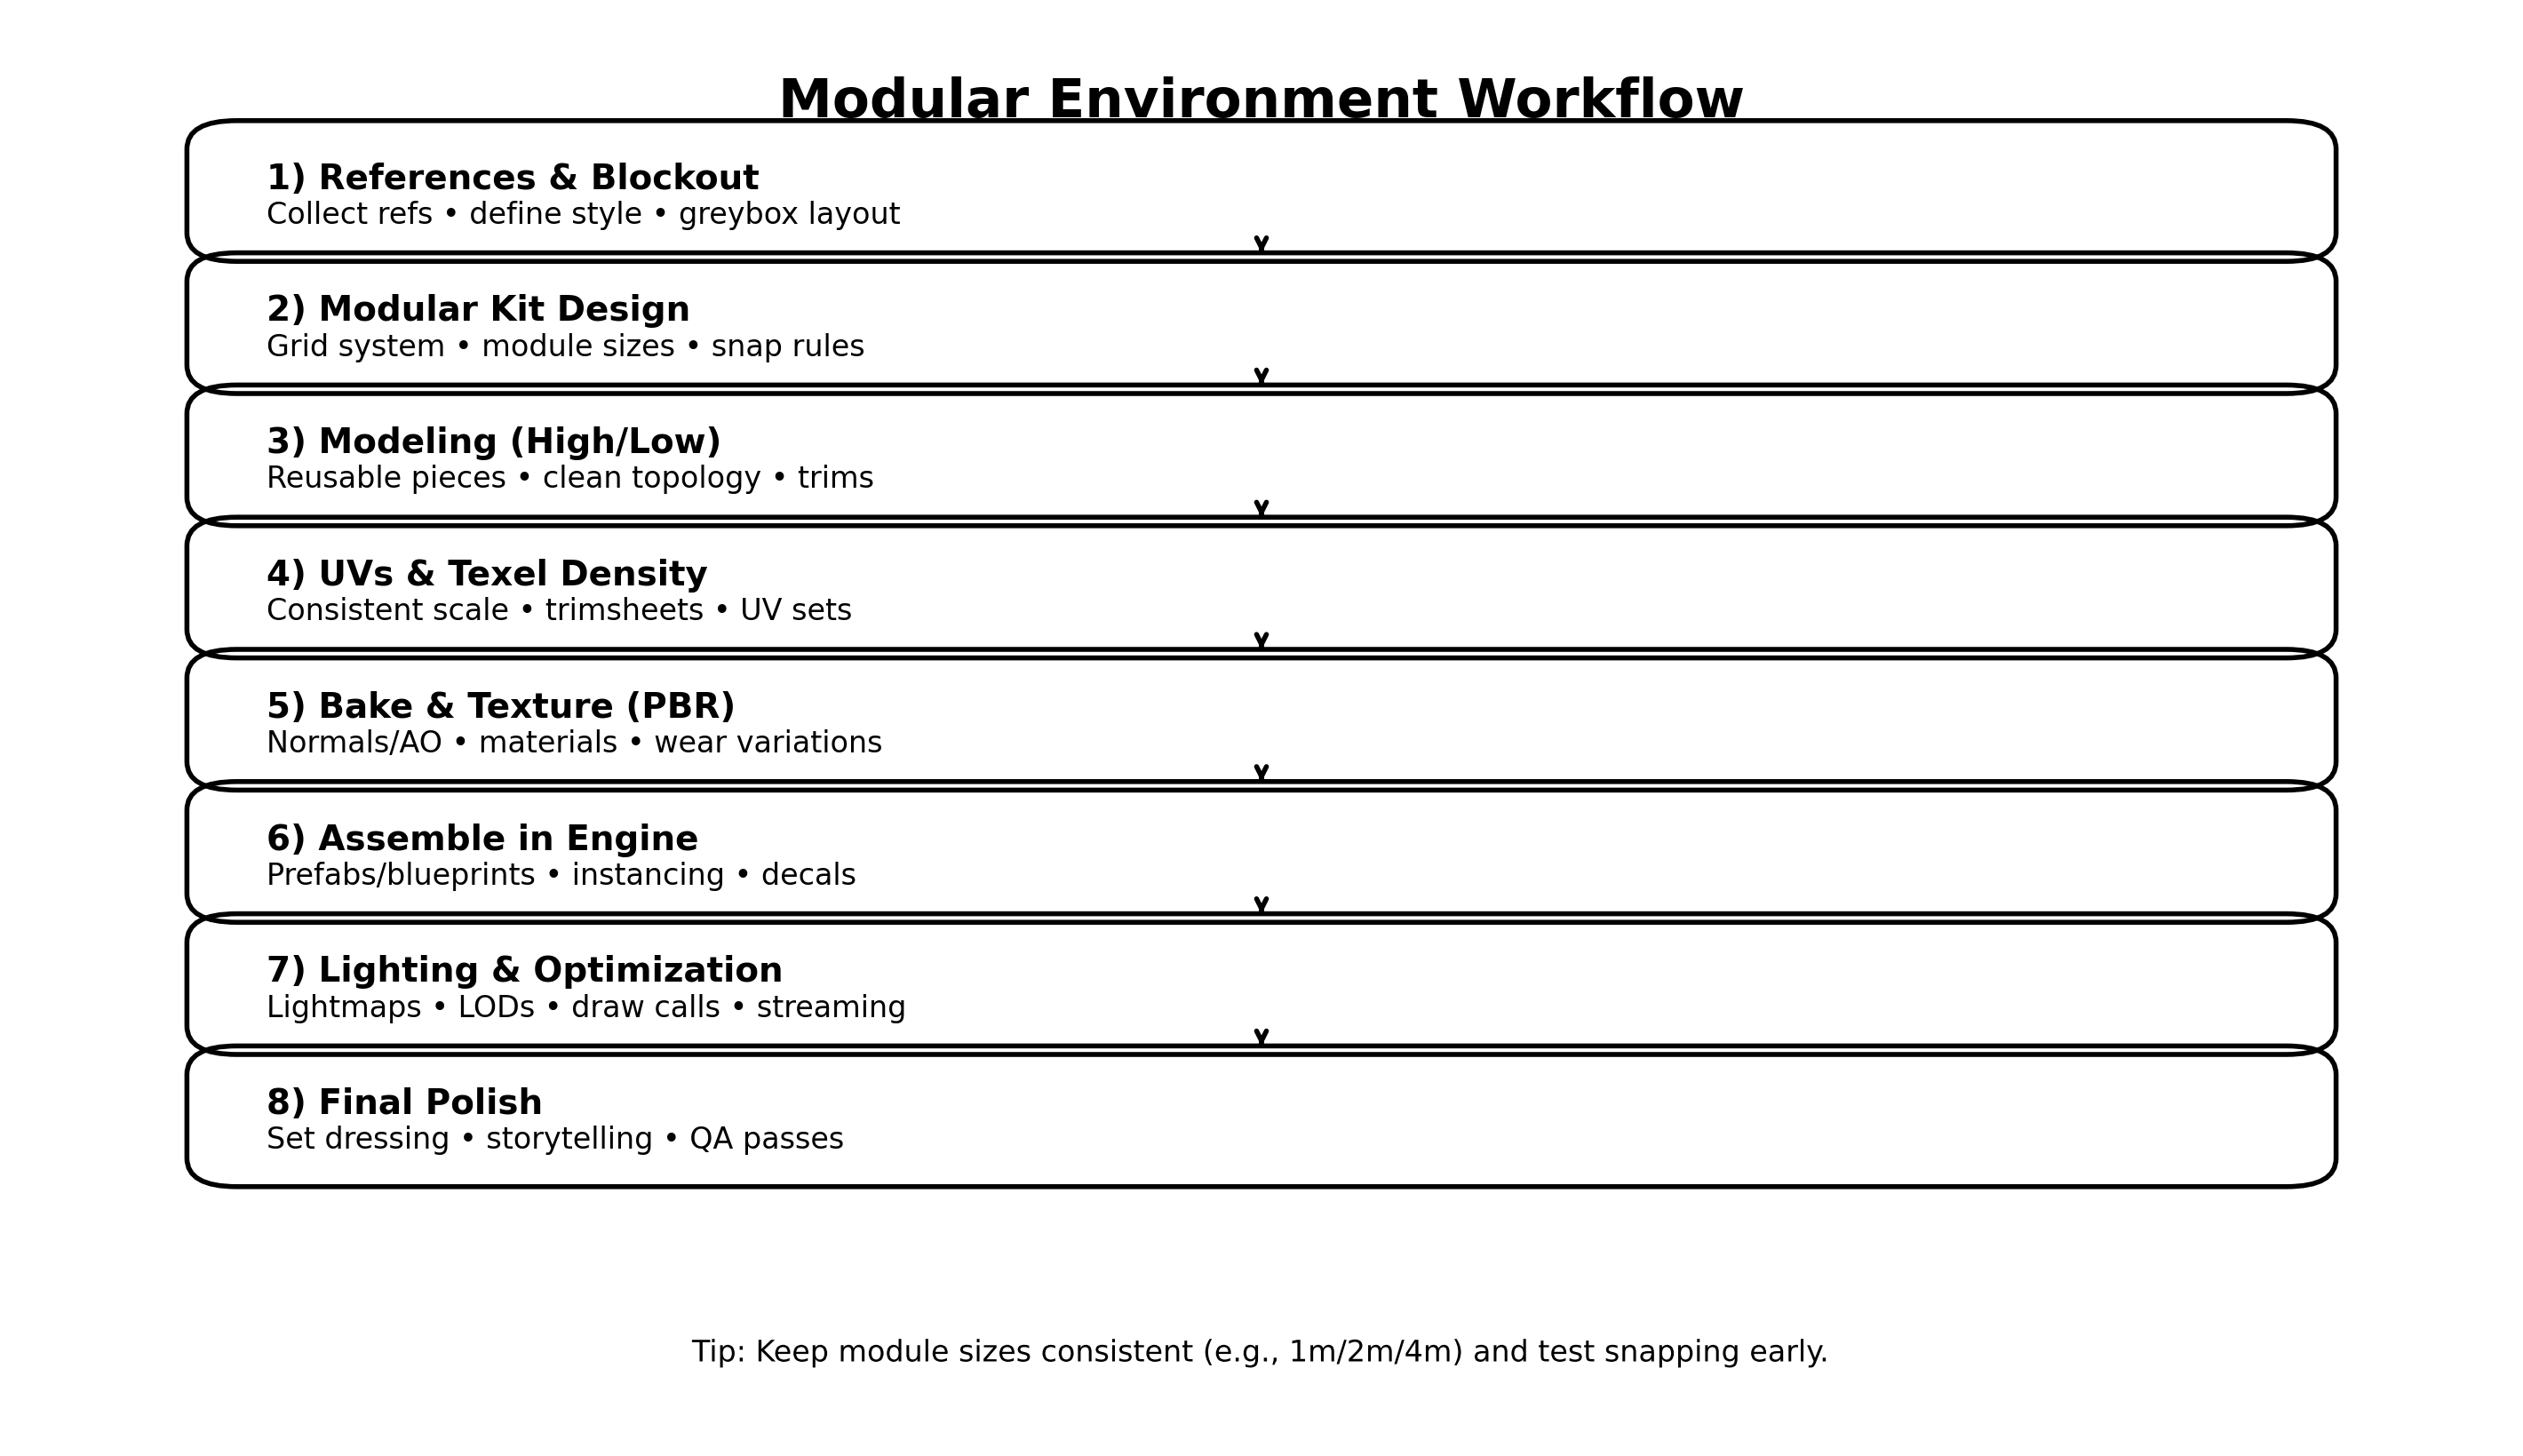
Below is a complete modular pipeline you can apply in Blender/Maya + Substance + Unreal/Unity, with practical tips to avoid common issues.
1) References and blockout: decide the rules before details
Every modular project starts with rules, not detail. Collect references that explain the space: architecture, materials, lighting mood, and functional layout. Then build a blockout (greybox): simple cubes that represent walls, doorways, pillars, ceiling height, and major props. The blockout is where you answer:
- How wide are corridors?
- How tall are doors?
- What is the player/camera height?
- How much negative space do you need for readability?
Do not skip this. A perfect kit won’t help if the layout feels cramped or unrealistic.
2) Choose a grid and module sizes (the foundation of snapping)
Modularity lives and dies by the grid. Pick a grid that matches your engine and your project scale. A common approach is:
- 1 meter as the main grid unit (or 50 cm for tighter detail)
- Module lengths like 1m / 2m / 4m
- Wall thickness that stays consistent across all pieces
Define snapping rules early:
- Pivot points go on corners or edges that will snap
- Rotations are typically 90° increments
- Modules must align on the same grid with no floating decimals
This is boring work, but it prevents 90% of modular pain later.
3) Design the kit: build only what you need (and nothing extra)
A strong modular kit is small and flexible. Start with the minimum set that can generate the space:
Core structural modules
- Straight wall segment (1m/2m/4m)
- Inner corner and outer corner
- Door frame module
- Window frame module
- Floor tile + ceiling tile
Detail and variation modules
- Pillars, trims, skirting boards
- Wall panels / decals
- Beams, vents, cables, neon signs
A key trick: build your kit around silhouette and breakpoints. Breakpoints are where modules can “hide” seams naturally (pillars, trims, beams, signage). If you place seams in plain flat walls with no breakup, you will always see repetition.
4) Modeling workflow: prioritize reusability over uniqueness
When modeling, keep meshes clean and predictable:
- Avoid weird dimensions that break the grid
- Keep bevel sizes consistent across the kit
- Maintain consistent scale and texel density targets
Many environment artists rely on trim sheets for modular kits. Trim sheets let you reuse one texture across many modules by mapping edges, panels, and trims to different parts of the same texture. This reduces texture count and keeps the environment cohesive.
If you do high/low workflows, do it where it matters:
- Hero modules and focal pieces deserve more detail
- Background modules can stay simple and rely on materials + decals
5) UVs and texel density: consistency beats “perfect UVs”
Modular scenes look professional when texture scale is consistent. Decide a texel density target (for example, “X pixels per meter”) and keep it stable across the kit.
Practical UV habits:
- Align UV shells to avoid diagonal noise patterns
- Stack identical shells to save texture space (when appropriate)
- Use second UV sets if you need baked lighting (lightmaps in Unreal)
If you’re using trim sheets, UVs become faster because you’re intentionally mapping parts to trims, not trying to uniquely unwrap everything.
6) Texturing: build a material system, not one-off textures
Texturing modular kits works best when you create a material library:
- Painted wall material
- Polished metal
- Wood veneer
- Plastic or laminate
- Carpet/cloth (great for lounges and poker rooms)
- Emissive neon/signage material
Then add variation without breaking consistency:
- Grime masks (edges, corners)
- Decals (posters, signs, stains)
- Vertex painting (blend dirt near the floor, add wear near corners)
This way, you can reuse the same modules but make areas feel different.
7) Assembly in engine: test early, then build fast
Bring your kit into the engine as soon as you have the first core modules. Assemble the blockout again, but now using real kit pieces. This is the moment you verify:
- Snapping works perfectly
- Pivots are correct
- Seams are hidden by design
- Scale feels right in camera
Use engine-friendly structures:
- Prefabs (Unity) or Blueprints (Unreal)
- Instancing for repeated objects
- Decals to break repetition
- “Variation pieces” swapped in occasionally (alternate wall panel, alternate trim)
If your kit is healthy, you should be able to build a large space quickly, like a hallway network, a lobby, or a multi-room interior.
8) Lighting and optimization: modular scenes can get heavy fast
Modular environments often repeat meshes—great for instancing—but they can still become expensive if you overdo materials, lights, or unique textures.
Optimization checklist:
- Combine materials where possible
- Use trim sheets and shared atlases
- Add LODs for frequently repeated props
- Keep emissive signage under control (especially in real-time)
- Use baked lighting/lightmaps when appropriate
- Avoid too many unique decals at high resolution
For neon-heavy scenes (like arcade or casino-style interiors), balance mood with performance: fewer, smarter lights usually looks better than dozens of tiny lights.
9) Final polish: storytelling beats raw detail
Polish is where your modular space stops feeling like a grid and starts feeling like a place. Add:
- Set dressing (chairs, clutter, wall art, plants)
- Story cues (used areas vs clean areas)
- Small asymmetry (rotate props, vary decals, change lighting temperatures)
- Composition passes (what the camera sees first)
A modular workflow is not about making everything identical. It’s about building a system that lets you create variety without rebuilding from scratch.